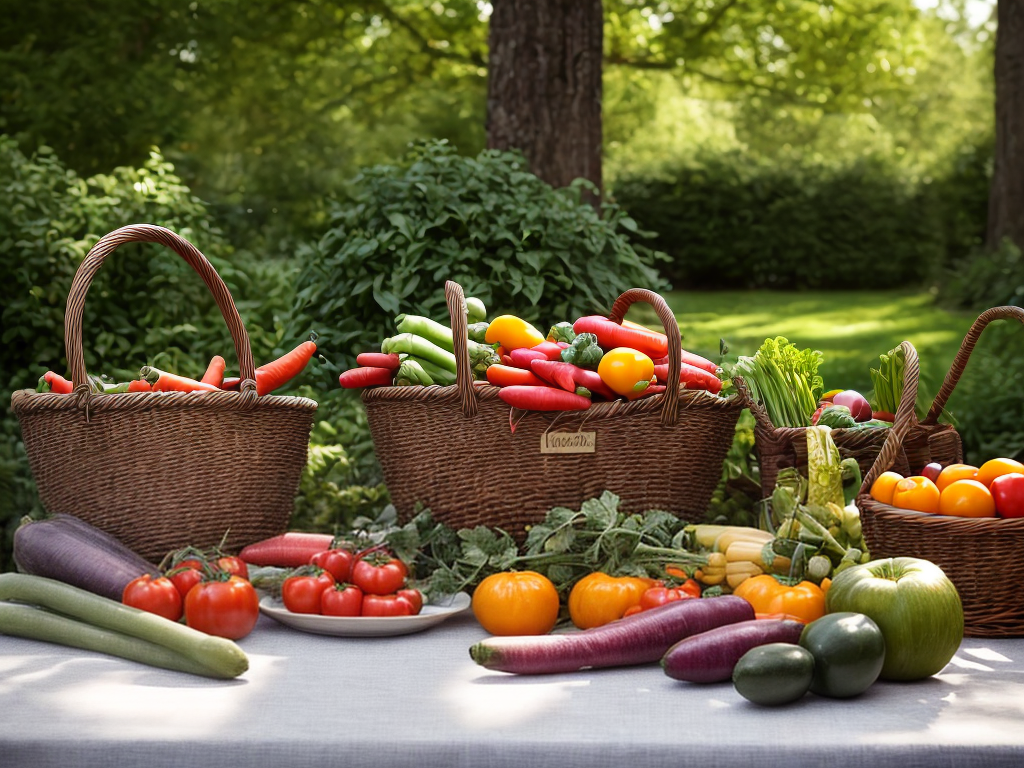
As I stand amidst the lush greenery of my garden, I am reminded of the bountiful harvest that awaits me. The sun-kissed tomatoes, vibrant peppers, and fragrant herbs beckon me to embark on a journey of preservation. But where do I begin? How can I ensure that the flavors and nutrients of my homegrown produce are captured and enjoyed long after the season has passed? In this discussion, I will share with you a treasure trove of recipes and tips that will guide you in preserving the essence of your garden’s bounty. From canning techniques to pickling methods, freezing strategies to dehydrating tips, and even creative ways to use the preserved produce, join me on this culinary adventure as we unlock the secrets of preserving nature’s gifts.
Overview of Preservation Methods
When it comes to preserving the bounty of your garden, there are several methods that can be used to ensure your fruits and vegetables stay fresh and delicious for months to come. Canning is one of the most popular and effective methods for long-term preservation. However, it is important to prioritize canning safety to prevent the growth of harmful bacteria. This includes properly sterilizing jars and lids, following approved recipes and processing times, and ensuring a tight seal.
If canning isn’t your preferred method or you’re looking for alternative preservation methods, there are other options to consider. Freezing is a simple and convenient way to preserve fruits, vegetables, and herbs. It helps retain their nutritional value and can be easily done at home with a freezer. Another alternative is dehydrating, which involves removing the moisture from food to prevent spoilage. Dehydrated fruits and vegetables can be stored for long periods and are ideal for snacks or use in cooking.
Canning Techniques
When it comes to preserving the bounty from your garden, canning is a popular and effective technique. There are three key points to keep in mind when it comes to canning: the basic steps involved, choosing the right equipment, and ensuring proper jar sterilization. By understanding these points, you’ll be well-equipped to preserve your garden’s harvest for months to come.
Basic Canning Steps
To ensure the preservation of your garden’s bounty, let’s explore the fundamental steps of basic canning techniques. Canning is a great way to store and enjoy your garden’s harvest all year round. Here are three key steps to follow for successful canning:
- Prepare your ingredients: Start by washing and trimming the fruits or vegetables you plan to can. Follow a trusted canning recipe to ensure proper proportions of ingredients and acidity levels. This is important for both flavor and canning safety.
- Sterilize jars and lids: Before filling the jars with your prepared ingredients, sterilize them in boiling water to eliminate any bacteria or contaminants. This step is crucial for preventing spoilage and ensuring the longevity of your preserved goods.
- Process and seal: Once your jars are filled with the prepared ingredients, carefully remove any air bubbles, wipe the jar rims clean, and securely seal them with sterilized lids and bands. Process the jars in a water bath or pressure canner, following the recommended processing time for your specific recipe.
Choosing Canning Equipment
Now that you understand the basic steps of canning, let’s explore the essential equipment you’ll need to ensure successful preservation of your garden’s bounty. When it comes to choosing canning equipment, there are budget-friendly options available that can get the job done effectively. The essential tools include a canner or large pot with a lid, canning jars with lids and bands, a jar lifter, a wide-mouth funnel, and a bubble remover or spatula. A canner or large pot is necessary for processing the jars in a water bath or pressure canner. Canning jars with lids and bands are needed to store the preserved food. A jar lifter allows you to safely remove hot jars from the canner. The wide-mouth funnel helps to fill the jars without creating a mess. Lastly, a bubble remover or spatula helps to remove any air bubbles trapped in the jars. With these budget-friendly options and essential tools, you’ll be well-prepared for successful canning.
Proper Jar Sterilization
Sterilizing your jars properly is a crucial step in the canning process to ensure the safety and longevity of your preserved food. To achieve this, here are three important guidelines to follow:
- Thoroughly clean the jars: Before sterilizing, wash the jars in hot, soapy water to remove any dirt or residue. Rinse them well to ensure no soap residue remains.
- Use a proper sterilization method: There are different methods for sterilizing jars, such as boiling, steaming, or using a dishwasher. Choose the method that suits you best, but make sure to follow the recommended time and temperature guidelines for each.
- Store jars in a dry, cool place: After sterilizing, allow the jars to air dry completely. Store them in a clean, dry, and cool area to prevent any moisture from compromising the seal.
Pickling Methods
Using various pickling methods can be a simple and effective way to preserve the abundance of your garden’s harvest. Pickling recipes are a great way to transform fresh vegetables into tangy and flavorful treats that can be enjoyed throughout the year. There are two main methods of pickling: vinegar pickling and fermentation pickling.
Vinegar pickling is the most common method and involves preserving vegetables in a mixture of vinegar, water, salt, and spices. This method results in a quick and ready-to-eat pickle that can be enjoyed within a few days. It is important to sterilize your jars before using them to ensure the pickles stay fresh and safe to eat.
Fermentation pickling, on the other hand, involves using salt to create an environment for beneficial bacteria to thrive. These bacteria naturally ferment the vegetables, creating a tangy and probiotic-rich pickle. This method requires a longer fermentation period, usually a few weeks to a few months, but results in a unique and delicious pickle with added health benefits.
When pickling vegetables, it is important to choose fresh and firm produce to ensure the best results. Wash and slice the vegetables to your desired thickness, and pack them tightly into the sterilized jars. Then, pour the pickling brine over the vegetables and seal the jars.
Experimenting with different pickling recipes and methods can be a fun and creative way to preserve your garden’s bounty. Enjoy your homemade pickles as a snack, a condiment, or a tasty addition to your favorite dishes.
Freezing Strategies
When it comes to preserving the bounty of my garden, freezing is one of my go-to strategies. Flash freezing vegetables is a great way to maintain their freshness and nutrients. Proper packaging techniques, such as using airtight containers or freezer bags, help prevent freezer burn and keep the flavors intact. Lastly, labeling and organizing the frozen items ensure easy access and avoid confusion when it’s time to use them.
Flash Freezing Vegetables
Flash freezing vegetables is a convenient and efficient method to preserve the freshness and nutritional value of your garden’s bounty. Here are three key points to consider when flash freezing vegetables:
- Flash freezing techniques: To preserve the quality of your vegetables, it is important to freeze them as quickly as possible. One popular technique is to spread the vegetables out on a baking sheet and place them in the freezer for a couple of hours before transferring them to airtight containers or freezer bags.
- Best vegetables for flash freezing: Some vegetables freeze better than others. Vegetables with high water content, such as peas, green beans, and corn, are excellent choices for flash freezing. These vegetables retain their texture and flavor when properly frozen.
- Blanching before freezing: Blanching, or briefly boiling the vegetables before freezing, helps to preserve their color, texture, and nutritional value. It also helps to kill any bacteria on the surface of the vegetables, ensuring they remain safe to eat.
Proper Packaging Techniques
To ensure the long-term preservation of your flash-frozen vegetables, it is crucial to employ proper packaging techniques. One effective method is vacuum sealing, which removes all air from the packaging to prevent freezer burn and maintain the quality of your vegetables. Vacuum sealing not only extends the shelf life of your produce but also helps retain their nutrients and flavors. Another option is to use high-quality storage containers specifically designed for freezing, such as durable plastic or glass containers with airtight lids. These containers provide an extra layer of protection against moisture and air, keeping your vegetables fresh for longer periods. When selecting containers, make sure they are freezer-safe and properly labeled for easy identification. By using vacuum sealing or suitable storage containers, you can maximize the longevity and quality of your flash-frozen vegetables.
Labeling and Organization
Proper labeling and organization are essential for effective freezing strategies. When it comes to preserving your garden’s bounty, implementing these practices will ensure that you can easily locate and utilize your frozen produce. Here are some labeling tips and organizing methods to help you maintain control over your freezer inventory:
- Label clearly: Use waterproof markers or labels to indicate the contents and date of freezing. This will prevent confusion and help you identify items quickly.
- Categorize by type: Arrange your frozen produce by categories such as fruits, vegetables, and herbs. This will make it easier to find specific items when you need them.
- FIFO method: Follow the “first in, first out” principle by placing newly frozen items behind older ones. This way, you can use the oldest produce first, ensuring freshness and minimizing waste.
Dehydrating Tips
When dehydrating fruits and vegetables from your garden, it is important to follow these helpful tips for optimal preservation. Dehydrating is a great way to extend the shelf life of your produce and enjoy their flavors year-round. Here are some key tips to consider:
| Dehydrating Tips | Description |
|---|---|
| Choose ripe produce | Select fruits and vegetables that are at their peak ripeness for the best flavor and texture. |
| Slice uniformly | Cut your fruits and vegetables into uniform slices to ensure even drying. This will help them dry at the same rate and prevent some pieces from becoming overly dry or under-dried. |
| Pre-treat with lemon juice | Some fruits, like apples and pears, tend to oxidize and turn brown during the drying process. To prevent this, dip them in a mixture of lemon juice and water before dehydrating. |
| Rotate trays | During the dehydration process, rotate the trays in your dehydrator to ensure even drying. This will help prevent any moisture buildup and ensure consistent results. |
Following these tips will help you achieve the best results when dehydrating your fruits and vegetables. It is important to note that different fruits and vegetables have varying drying times, so it’s crucial to refer to specific dehydration recipes for accurate instructions. By dehydrating your garden’s bounty, you can enjoy your homegrown produce throughout the year in a delicious and convenient way.
Making Jams and Jellies
Preserve the flavors of your garden’s bounty by learning the art of making jams and jellies. Making preserves is a delightful way to capture the essence of fresh fruits and enjoy them all year round. Here are three key tips to ensure your jams and jellies turn out perfectly:
- Choose the right fruit: Select ripe, high-quality fruit for the best results. The flavor and sweetness of the fruit will greatly impact the taste of your preserves. Make sure to remove any bruised or damaged parts before using.
- Balance the ingredients: Achieving the perfect consistency and taste in your jams and jellies requires a careful balance of fruit, sugar, and pectin. Pectin is a naturally occurring substance found in fruits that helps set the preserves. Follow recipes closely and measure ingredients precisely to ensure a successful outcome.
- Properly preserve your jars: To safely store your homemade preserves, it’s essential to properly seal and process your jars. Use sterilized jars and lids to prevent spoilage. Follow canning instructions carefully, including the recommended processing time and temperature, to create a vacuum seal that will keep your preserves fresh and safe to consume.
Fermenting Fresh Produce
Now, let’s explore the fascinating world of fermenting fresh produce to create unique and flavorful culinary delights. Fermentation is a natural process that has been used for centuries to preserve food and enhance its flavor. By harnessing the power of microorganisms, such as bacteria and yeast, fermentation transforms fresh produce into tangy, complex creations.
The benefits of fermentation are twofold. Firstly, it increases the shelf life of fruits and vegetables, allowing you to enjoy your garden’s bounty for longer periods. Secondly, it introduces beneficial bacteria into your diet, which can promote a healthy gut and boost your immune system.
To start the fermentation process, you’ll need a few key ingredients: fresh produce, salt, and water. The salt acts as a natural preservative and helps create the ideal environment for fermentation. Simply chop or shred your produce, pack it into a jar, and cover it with a brine solution made from salt and water. Then, allow the jar to sit at room temperature for a few days to weeks, depending on the desired level of fermentation.
During this time, the microorganisms in the produce consume the sugars and produce lactic acid, giving fermented fruits and vegetables their distinctive tangy flavor. The longer the fermentation process, the stronger the flavor will be.
Creative Ways to Use Preserved Garden Produce
One of the most exciting aspects of preserving your garden’s bounty is discovering creative ways to use the preserved produce in a variety of delicious dishes. Not only does it allow you to enjoy your garden’s harvest all year round, but it also adds a burst of flavor and freshness to your meals. Here are three creative recipes and preserving tips to help you make the most of your preserved garden produce:
- Salsa Verde: Blend preserved tomatillos, cilantro, garlic, and lime juice to create a tangy and vibrant salsa verde. Use it as a dip for tortilla chips, a topping for grilled meats or vegetables, or a sauce for tacos and enchiladas.
- Ratatouille Pizza: Spread preserved tomato sauce on a pizza crust and top it with slices of preserved zucchini, eggplant, and bell peppers. Sprinkle with herbs like basil and oregano, and finish with a drizzle of olive oil. Bake until the crust is golden and the vegetables are tender for a flavorful twist on a classic pizza.
- Pickled Vegetable Salad: Combine preserved cucumbers, carrots, and radishes with fresh lettuce, herbs, and a tangy vinaigrette for a refreshing and colorful pickled vegetable salad. It’s a great way to use up your preserved vegetables and add a crunchy element to your salads.
Conclusion
Preserving your garden’s bounty is a wonderful way to enjoy the flavors of your hard work year-round. From canning and pickling to freezing and dehydrating, there are numerous methods to choose from. By following the proper techniques and tips, you can ensure the freshness and quality of your preserved produce. Whether you’re making jams and jellies or fermenting fresh produce, the possibilities are endless. So, get creative and start preserving your garden’s bounty today!


